Making sushi is a creative art that requires patience and skill. Some chefs may even insist it’s an art form, while others scoff and call it a craft. But no matter how you look at it, one thing’s for certain: all great sushi starts with great sushi vinegar. Because when made right, sushi vinegar not only adds flavor and acidity to the rice, it also helps to bring out the flavors of the fish and other toppings used in sushi.
Many stores offer all-natural sushi vinegar, but did you know you can make your own at home in just five steps? And best of all, you don’t have to be a master sushi chef to do it. In this blog post, we’ll be discussing just how easy it is to make your own sushi vinegar at home. So let’s get started!
Table of Contents
Quick Summary
You can make your own sushi vinegar by combining rice vinegar, kombu seaweed and salt. The proportions and the length of time you allow it to steep will depend on the flavor and intensity you are looking for.
Making Your Own Sushi Vinegar
Making your own sushi vinegar can be an intriguing, yet challenging process that requires some knowledge and practice. Although the cost of buying store-bought sushi vinegar is relatively cheap compared to the other ingredients needed to make sushi at home, making your own at home could provide a unique flavor and texture to meet your specific needs. Plus, you can also control the amount of acidity in the vinegar you create as well as customize it with flavorings, such as herbs or spices. With these options in mind, it can be argued that making your own sushi vinegar at home provides more creativity and control than simply buying store-bought versions.
On the other hand, making your own sushi vinegar can be very time consuming and difficult. Unless you have plenty of time to spare and a thorough knowledge of traditional sushi vinegar recipes and flavors, it may be easier to simply buy decent quality store-bought sushi vinegars rather than attempting to make it yourself from scratch. Additionally, store-bought versions are normally more consistent than homemade ones. Therefore trying to work out the exact proportions of rice vinegar and sugar when crafting your own can be tricky and ultimately result in a subpar product compared to store bought varieties.
The debate for which option is best ultimately comes down to personal preference and how much time one has on their hands. If you’re up for taking on the challenge, this article will give you step-by-step instructions to create your own custom made sushi vinegar at home in just five easy steps. Next we will discuss the ingredients needed for homemade sushi vinegar.
Ingredients Needed for Sushi Vinegar
Making sushi vinegar at home is simpler than it seems, but a few key ingredients are needed first. First, you need to get your hands on some quality rice vinegar. Traditional rice vinegars are made from fermented rice and come in either white or red varieties. White rice vinegar is milder and has a more delicate flavor, while red rice vinegar adds a richer, more robust flavor to dishes. Both are great for making sushi vinegar, so you can choose whichever one suits your taste better. In addition to rice vinegar, you’ll also need some white granulated sugar, salt, and maybe kombu (a type of dried seaweed). Kombu is normally used to add umami flavor to the sushi vinegar, though it’s optional – feel free to omit it if you don’t have any on hand.
Now that we know what ingredients are necessary for making sushi vinegar at home, we can move on to the process of actually preparing it. The following section will cover how to make your own sushi vinegar in 5 easy steps.
Rice Vinegar
Rice vinegar is a common ingredient in sushi and is typically made from fermented rice. It has a slightly sweet taste and adds a subtle flavor to the sushi. Rice vinegar can be purchased at most grocery stores, but making your own gives you the option to choose the kind of rice to use and how strongly flavored you want your sushi vinegar to be.
There are two types of rice vinegar – plain (white) and black. White rice vinegar is milder and sweeter while black rice vinegar has a more complex flavor. Some argue that plain white vinegar provides the perfect balance between saltiness, sweetness, and acidity for making sushi but others disagree and suggest black rice vinegar as it contains more nutrients, including antioxidants.
Whichever type of rice vinegar you choose, it should have enough sugar content for optimal fermentation when combined with other ingredients. When selecting a brand of white or black rice vinegar at the grocery store, look for one without artificial flavoring or preservatives to ensure the best quality product.
In conclusion, both types of rice vinegar provide unique flavors when used in making sushi so each person must determine which type they prefer based on their individual tastes.
Now that we have discussed rice vinegar let’s move on to discussing salt & sugar in the next section.
Salt & Sugar
When making sushi vinegar, salt and sugar both have important roles to play in the creation of the perfect sushi vineger solution. The sugar and salt are also responsible for enhancing or subduing certain flavors, providing balance, and creating a richer taste.
The most common ratio of salt to sugar is 3:2, which means three tablespoons of salt for every two tablespoons of sugar. However, it’s possible to adjust the amount of salt and sugar depending on one’s personal tastes. For example, more sugar can be added if you like a sweeter sushi vinegar and more salt can be added if you prefer a salty sushi vinegar. Those who prefer a less sweet and less salty version may opt to use equal parts of sugar and salt.
In addition to creating balance in terms of taste, adding sugar helps to offset some of the sharpness associated with Shoyu soy sauce. Salt meanwhile adds flavor to the ingredients as well as serves as a preservative, helping the sushi vinegar keep its flavor over time. It also helps to bring out the full flavor potential of all other ingredients used in the sushi vinegar solution.
After considering each ingredient’s desired outcomes separately and together, carefully adjust the ratio of salt & sugar until you have reached your desired sushi vinegar concoction. Once balanced, move on to explore “Optional Additives and Spices” in order to further enhance your custom creation!
Optional Additives and Spices
In making homemade sushi vinegar, many cooks consider the addition of spices and flavorings as both a creative and tasty way to add unique elements to their culinary creations. Commonly used additives can include kelp powder, dried mushrooms, sesame seeds, bonito flakes, ginger, citrus peel and shiso leaves.
Spices such as turmeric, cumin, paprika and even curry may yield unexpected but delightful flavors when added to sushi vinegar. The amount of each ingredient should be determined by personal preference; some chefs prefer to add two or three spices in small quantities while others will be more generous with their usage. The flavors are most noticeable after the vinegar marinates for at least 12 hours.
Not all cooks find the addition of these spices to be necessary; some believe that the existing combination of acidity and saltiness from the rice vinegar provides delicate balance without any further enhancements. Furthermore, if one is not a fan of bold flavors, spices might make the taste peculiar or overwhelming. Each cook must determine what appeals to them in terms of spiciness and special seasonings.
Now that the optional ingredients have been discussed, it’s time to turn our attention toward the making process itself.
The Making Process
When making sushi vinegar at home, the first step of the making process is to select high-quality, raw ingredients. For example, some recommend trying out different varieties of organic, non-refined rice vinegars for their fuller flavor and aroma. The second step is to select a type of sweetener, such as brown sugar or honey, which can be mixed into the vinegar to create the desired sweetness.
Once you have selected your ingredients, it’s time to start cooking! In a saucepan over medium heat, combine the vinegar and sweetener until dissolved and heated through. The ratio of vinegar to sweetener usually depends on the desired taste; however, a general ratio of four parts vinegar to one part sweetener is typically recommended for a slightly tart, but sweet sushi vinegar. As you are cooking, you may want to sample the mixture occasionally until it achieves your desired sweetness level.
It’s important to use caution when cooking with these ingredients since they are both flammable. Once all ingredients have been properly combined and dissolved in the saucepan and heated through, remove it from heat and let cool before transferring to another container. Once cooled off and transferred, store your custom sushi vinegar in an airtight container in your refrigerator until needed for future use. Next we’ll discuss adding and mixing additional ingredients for added flavor complexity.
Adding and Mixing the Ingredients
The next step in making sushi vinegar is to add and mix the ingredients. All that’s required is a mix of rice wine vinegar, salt, and sugar. When adding these ingredients, some chefs like to use equal parts of each, while others may prefer a higher proportion of one ingredient than another. For instance, increasing the amount of salt or sugar can create a tangier or sweeter flavor. Once all three components are mixed together, stir until they have completely dissolved into your vinegar solution.
Some chefs may debate over whether to make the vinegar before adding the other ingredients or mixing everything together simultaneously; however, both approaches tend to have good results if done correctly. When making the mixture ahead of time, it allows you to adjust the quantities more precisely and easily as you go along. Meanwhile, stirring everything in at once prevents any potential cross contamination between ingredients and helps to ensure an even distribution of flavors.
Regardless of which approach you choose, be sure to stir your sushi vinegar slowly and thoroughly for a consistent result. After combining the ingredients together, it’s time to move on to adjusting the flavor and consistency of your sushi vinegar in the next section.
Adjusting the Flavor and Consistency
When it comes to adjusting the flavor and consistency of your homemade sushi vinegar, there are a few considerations to keep in mind. Sugars are essential for creating the ideal balance between sharp and sweet, so you may need to adjust the added sugar depending on your preferences. If you find that the saltiness is too strong, try adding some water then readjusting the other ingredients as needed.
Some people also like to add a teaspoon of kombu dashi stock granules or dried bonito flakes (katsuobushi) to give their sushi vinegar an extra depth of umami flavor. However, although activating these flavor enhancers can contribute to a more complex flavor profile, they are not necessary for making delicious sushi vinegar. Therefore, it is up to you whether or not you choose to use them.
It is also important to stir regularly through the fermentation process as this will help disperse any solid ingredients evenly throughout the liquid portion of the vinegar solution. This will also ensure that all ingredients dissolve completely and create an even consistency in your finished sushi vinegar.
Once you are happy with the flavor and texture of your sushi vinegar, it is time for final preparation and usage.
Essential Summary Points
When making sushi vinegar, it is important to adjust the sugar, salt, and water as needed to create a balanced flavor. To add extra depth of flavor, kombu dashi stock granules or dried bonito flakes can be added. It is also necessary to stir regularly during the fermentation process to make sure the solid ingredients dissolve completely and for a consistent texture. Once you are happy with the flavor and texture, you can use it in your sushi recipes.
Final Preparation and Usage
Preparing your own sushi vinegar is a simple process, but the end result needs to be handled with care. Once you have the ingredients and materials ready, here’s what you need to do to ensure you have top-quality sushi vinegar:
1. Measure the vinegar and salt according to the recipe. Make sure to use precise measurements; errors in the amount of salt or vinegar can have a huge effect on flavor.
2. If desired, combine additional seasonings (such as sugar, kombu, or sake) with the mixture. Adding these ingredients can add complexity and depth of flavor. Use moderation when adding seasonings, though—too much can easily overpower the taste of your sushi vinegar.
3. Put the mixture into an airtight container or bottle, such as a glass jar or plastic container with a secure lid. It’s important not to let any unwanted bacteria into the vinegar; after all, it will be stored at room temperature for an extended period of time.
4. Shake the container thoroughly before each use; this ensures that all of the flavors and seasonings are properly mixed together.
5. Finally, your homemade sushi vinegar is ready for use! When using it as part of sushi recipes, remember that since it is unpasteurized, it must be used within a few days of preparation and should not be consumed raw by itself. After this time has expired, discard any remaining sushi vinegar and begin again with fresh ingredients next time.
When making sushi at home, many Japanese chefs debate over whether or not using home-made sushi vinegars are superior to store bought versions due to their freshly made nature or if store bought versions provide more consistent taste profiles due to their pasteurization process and longer shelf life as a result thereof. Despite these debates, there is no clear consensus among professional chefs which one is superior as both have their own advantages and disadvantages depending upon preference and available resources such as access to high-quality ingredients or specialized tools like thermometers for measuring temperatures needed when mixing ingredients correctly according to traditional recipes for making various types of sushi vinegars.
Frequently Asked Questions and Their Answers
What is the best ratio of ingredients for sushi vinegar?
The best ratio of ingredients for sushi vinegar is 1 cup of rice vinegar, 2 tablespoons of sugar, and 1 teaspoon of salt. This ratio creates a balanced flavor that works well in both roll and nigiri sushi.
The vinegar adds a subtle tanginess to the dish, while the sugar adds sweetness that can counteract any overly salty elements. The salt adds a subtle but important umami flavor which enhances the overall flavor profile. Adding too much sugar or salt can overpower the vinegar and ruin your sushi!
How long does sushi vinegar last once prepared?
Sushi vinegar will last for up to two weeks if kept in an airtight container and stored in a cool, dry place. It is important to remember that sushi vinegar is highly acidic, so even if stored properly it’s best to use within that two week period before it begins to lose its flavor. Additionally, you may want to toss out your sushi vinegar if it has been open for more than a month or if it has become discolored or produces an unpleasant aroma as these are signs that the vinegar has gone bad.
What ingredients do I need to make my own sushi vinegar?
In order to make your own sushi vinegar, you will need rice vinegar, sugar, and salt. The specific amounts for each ingredient depends on the desired taste. Generally, for every 5 cups of rice vinegar, you should use 1/4 cup of sugar and 2 tablespoons of salt.
Rice vinegar is essential for making sushi vinegar as it provides the flavor base. It is also light and pairs well with other ingredients like sugar and salt. Sugar helps to round out the umami flavors by adding a touch of sweetness. Salt balances out the sweetness by providing a subtle kick of saltiness. Adjusting the amount of either ingredient can change the intensity of flavors in your sushi vinegar.
Once all ingredients are combined, mix them together until they are evenly incorporated then allow them to sit at room temperature for 4-7 days. During this time, chemicals interact and produce the desired flavor profile. Once enough time has passed, sample the vinegar and adjust any components to your liking before bottling it up for future use.
Making your own sushi vinegar doesn’t take much time or money, but by combining different ratios of rice vinegar, sugar and salt, you can create unique flavors that would otherwise be difficult or impossible to find in stores. With a little practice, you can come up with your perfect combination and make delicious sushi dishes right at home!
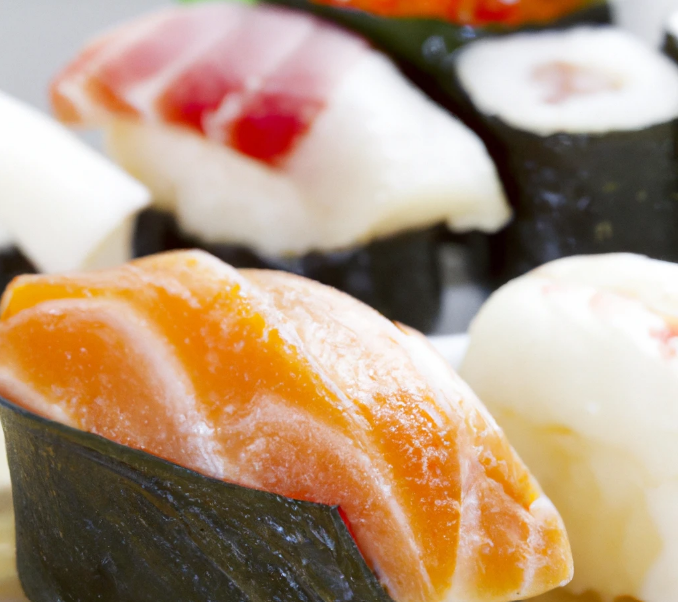
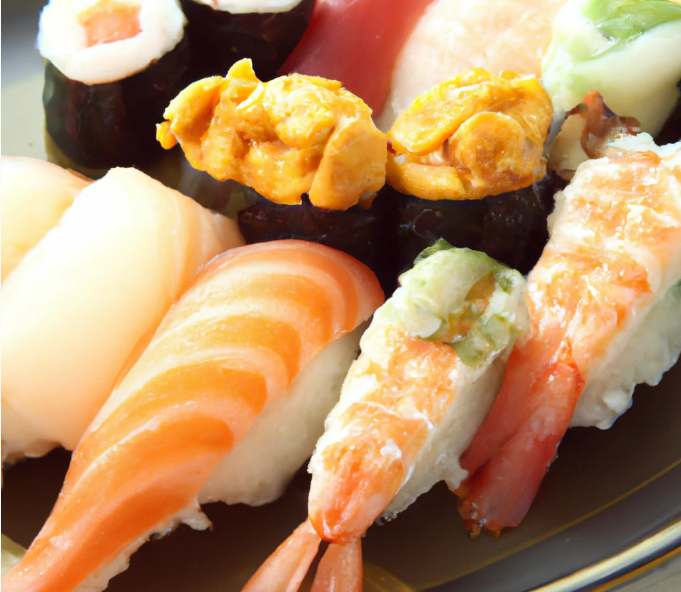
What types of fish and vegetables pair best with homemade sushi vinegar?
The types of fish and vegetables that go best with homemade sushi vinegar are generally mild-tasting varieties. Fish such as tuna, salmon, and yellowtail pairs nicely with homemade sushi vinegar, as the subtle flavor of the vinegar complements the flavors of the fish. Vegetables such as cucumber, avocado, and radish pair well with homemade sushi vinegar because they are light and not overpowering.
In addition to traditional sushi ingredients, other unique additions such as mango, daikon, or carrot can make for an interesting combination with homemade sushi vinegar. Lightly pickled vegetables such as ginger and shiso also add a refreshing sweetness to the mix. Be adventurous in your combinations—sushi is about experimenting!
How can I store my homemade sushi vinegar?
Your homemade sushi vinegar should be stored in an airtight container and kept at room temperature out of direct sunlight. Make sure to label it clearly so that it can be easily identified as sushi vinegar and quickly used when needed. It’s best to use the vinegar within 4-6 weeks of making it, but if properly stored you can use it for up to a couple months. It may also be a good idea to strain the vinegar through a fine mesh sieve prior to bottling and storing so any particles or sediment don’t affect the taste or texture of your sushi dishes.