Using pics and a video lesson, you can learn how to produce excellent sushi rice every time. Simple items like salt, sugar, sushi vinegar, and kombu are all you require. Once you master the art of making sushi rice, you will be well-equipped to prepare various delectable sushi dishes!
Sushi rice that has been cooked to perfection is essential when making any sushi recipe. Furthermore, the top sushi restaurants in Japan are known for their fresh fish and variety and their sushi rice skill and quality. Here, I revealed my secrets and procedures for making authentic sushi rice. If you follow along, you will gain detailed information on preparing the best sushi rice for all types of sushi at home!
Table of Contents
What is Sushi Rice?

Sushi rice is created using Japanese short-grain rice and seasoning it with salt, sugar, rice vinegar, and sometimes kelp (kombu) mixture. Sushi rice is also called su-meshi, sushi-meshi, or shari. This vinegar-flavored rice is the only rice we use for creating sushi.
Click the button below to buy the sushi rice we recommend

But, since some rice companies outside of Japan describe Japanese short-grain rice as “sushi rice,” things can get a little complicated when looking for the best sushi rice on the market. It gives the impression that the rice is only for making sushi recipes. We frequently use the same rice for steamed rice and other rice recipes.
Sushi rice is a bowl of high-quality short-grain rice that is circular and shorter than Jasmine and Basmati varieties. It is also defined as sticky rice, ideal for forming small bite-size sushi portions. While Japan is renowned as the world’s sushi capital, sushi rice, also known as short-grain rice, comes from China.
How to Make Sticky Rice for Sushi in a Rice Cooker?
Sticky rice comes from various nations worldwide, including China, Thailand, and Japan. For this recipe, look for Chinese sticky rice or Thai sticky rice, often known as “sweet rice” or “glutinous rice,” for this recipe. A variety knows the grain of names, but they all refer to the same item.
Sticky rice is traditionally steamed, but did you know that you can prepare it in your rice cooker and achieve great results? Sticky rice cooked in a rice cooker saves time and effort, and it is so simple to make that you will catch yourself making it more often. Sticky rice goes well with curries, stir-fries, dumplings, and other foods that have a tasty sauce. It is also fantastic in desserts, such as sticky mango rice. You can prepare sticky rice in a saucepan on the stove if you do not have a rice cooker.
When making sticky rice in a rice cooker for sushi, the ingredients you need are:
- Two cups of glutinous rice or sweet rice (Thai sticky rice).
- 2.5 cups of tap water.
- Half a teaspoon of kosher salt.
Below are the instructions to follow when making sticky rice for sushi in a rice cooker.
1. Gather all your ingredients and place the rice in the rice cooker.
2. Add the water and mix it with the rice.
3. Allow the rice to sit for 40 minutes to 4 hours. The hard external layer of sticky rice requires to soften to produce the optimum texture.
4. Add the salt to the rice mixture and stir it again. Proceed to turn on the rice cooker.
5. Once the rice cooker turns off, allow the rice to sit there for about five minutes more. Note that the longer the rice sits there, the stickier it becomes. Serve when hot.
How to Make Perfect Sushi Rice in a Rice Cooker?
Ingredients you need
• Short grain rice from Japan
• Rice Vinegar
• Salt
• Sugar
• Kombu (kelp)
Cooking steps
1. Use short-grain Japanese rice to make authentic Japanese standard sushi rice. Due to its high moisture content, Japanese rice has a unique texture and sticky consistency, giving it the authentic original flavor of sushi rice. The best Japanese short-grain rice is Koshihikari from Japan, California, or Toyama Prefecture.
2. Wash and rinse the rice several times using a strainer or fine-mesh sieve and cold tap water until no more starch content leaves the water. Continue to soak the rice for a minimum of 30 minutes to give it a better texture, and then drain it.
3. Place the short-grain rice into the rice cooker bowl and cover it with water until the two-cup fill line is in the cooker.
4. Press Rice and Start.
5. Although it is not mandatory, add kombu to get the umami flavor of kombu-infused rice.
6. Always season your sushi rice with sushi vinegar to make it more flavorful. This vinegar comes from mixing sugar, salt, and rice vinegar to give it a salty, sweet, and sour taste. Ensure that you use mild-flavored rice vinegar since one that is too strong or flavorful will destroy the flavor.
7. Mix the ingredients in a bowl. Heat the mixture in a pot over the stovetop or microwave to ensure that the sugar fully dissolves. You might also find high-quality sushi vinegar in supermarkets or a Japanese or Asian grocery store.
8. Add the sushi vinegar to the cooked rice in a baking sheet lined with parchment paper or sushi oke (hangiri). Remember that the rice must cool first before adding the sushi vinegar. As soon as the rice is in the sushi oke, pour the sushi vinegar over the rice.
9. Use a spatula to mix the sushi vinegar with the rice using the slicing motion. This method allows the rice not to become smashed or mushy. The sushi rice should be shiny and cool with proper slicing and fanning. Gently flip the rice in slices until its temperature is cool and similar to that of human skin.
10. Once you finish mixing, cover it with a damp towel, and now it is ready to use. Make sure that it stays under room temperature.
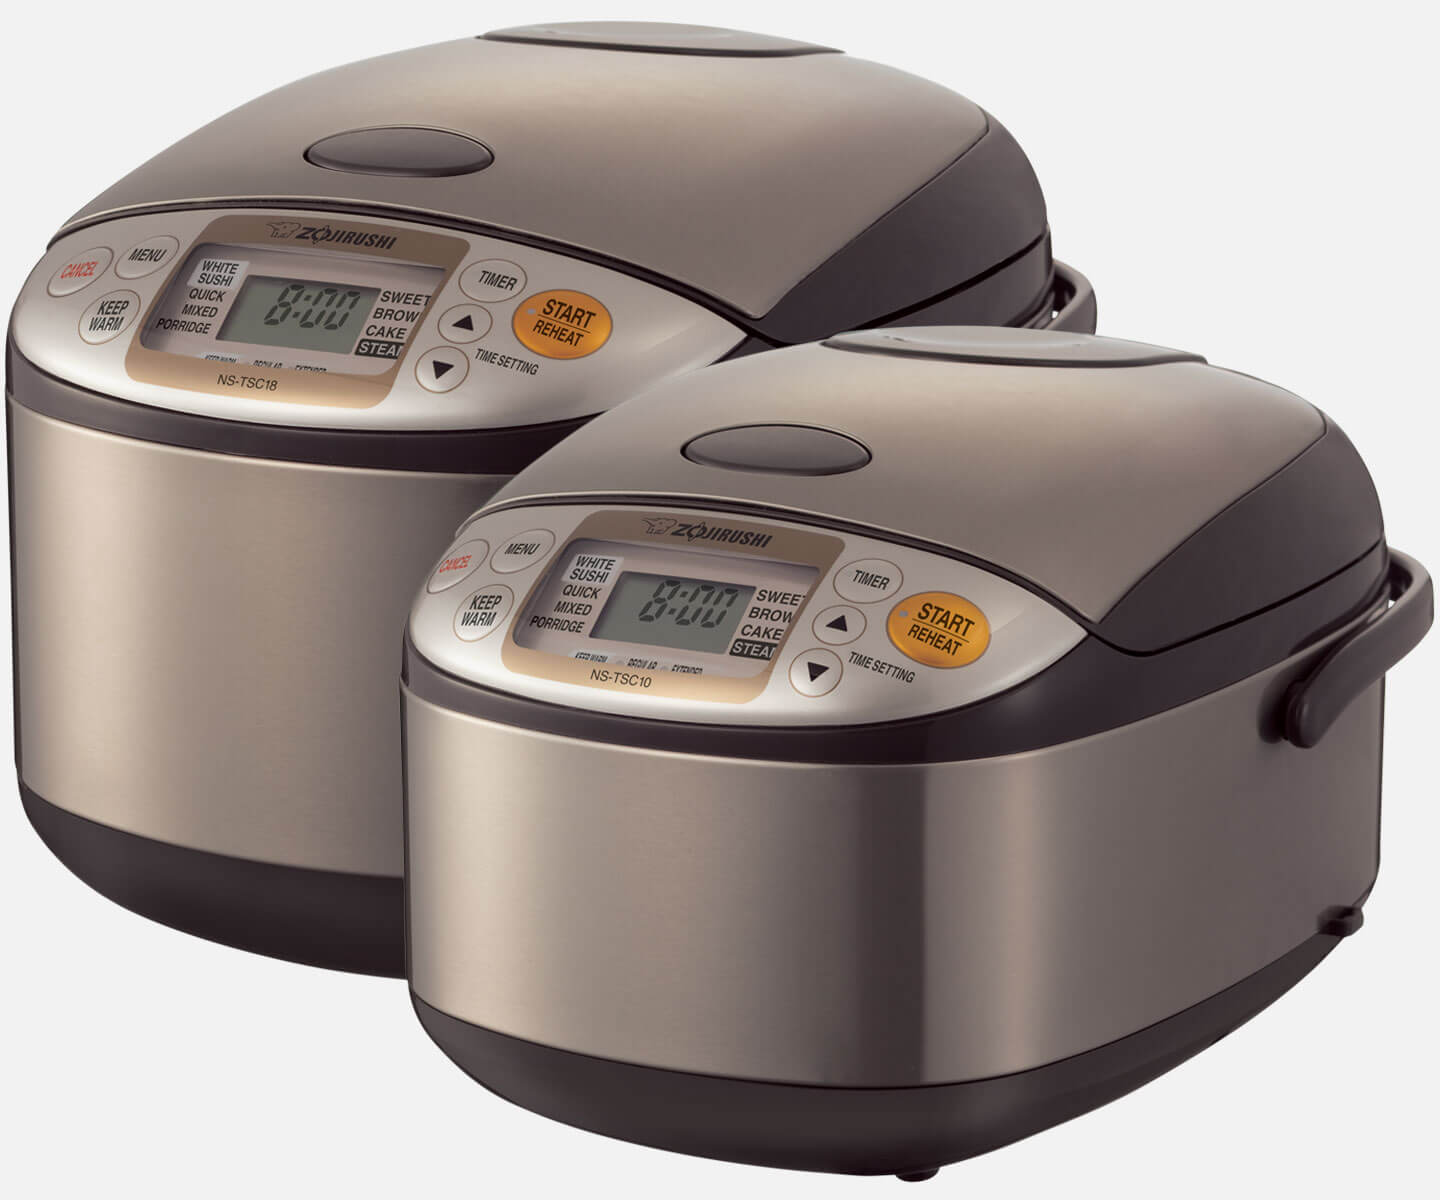
You can cook the rice in a saucepan on the stove, but the most practical method is to use an electric rice cooker to make sushi rice. The go-to rice cooker in most Japanese kitchens is the Zojirushi Rice Cooker. If you frequently cook sushi rice, this rice cooker features a ‘sushi’ setting that makes it very simple to ensure that the rice is cooked to perfection.
Another excellent rice cooker option is the Aroma rice cooker. This digital rice cooker is easy to use. It comes with easy-to-understand instructions, designated measurement lines on the inside of the pot, and measurement cups in its packaging. Another excellent choice is the t&j rice cooker.
A more affordable rice cooker is the Aroma Housewares Rice cooker. You can find them on our Aroma Rice Cooker page.
How to make sushi rice in a pressure pot?
Take note that you can also make sushi rice using various methods. Some of them include:
• Using an instant pot: Inside the bowls of an Instant Pot, combine the water and the rice for a few seconds, then add the kombu over the rice. Seal and pressure cook on high heat for five minutes, and then set it at natural release for ten minutes, then rapid release. Remove the kombu and throw it away.
• Using a stovetop:
Mix the water and the rice (we recommend using 2 1/4 cup water for this technique).
Proceed to lay the kombu over the rice and seal with an air-tight lid.
Raise the temperatures to medium-high and continue to cook till the water achieves a gentle simmer.
Lower the temperature to medium-low. Boil for 16-18 minutes or until the liquid has been dissolved and the rice is soft.
Take the saucepan from the heat (while keeping the lid on) and steam the rice for another ten minutes. Remove the kombu and throw it away.
How to make sticky sushi rice in a slow cooker?
Using a slow rice cooker to make sticky sushi rice is not advisable because it is relatively quick. Due to the slow cooker’s slow and low heat, the rice becomes gummy fast.
How to make sushi rice in a rice cooker calrose?
Calrose rice refers to white medium-grain rice that hails from California (thus the “Cal” in the name). It was initially launched in 1948, making it a relative newcomer to the world of rice. Calrose now produces 85 percent of the rice produced in the state.
Since it is so mild, it goes nicely with almost every other flavor. Calrose rice is slightly sticky and soft when cooked, making it an excellent choice for sushi, side dishes, or stir-fries. When cooking Calrose rice to make sushi rice in a rice cooker, follow the instructions below.
1. First, read your manual to see if it has directions for cooking Calrose rice.
2. Use the measuring cup in your rice cooker package to weigh the rice, then rinse it in a fine-mesh strainer or sieve.
3. After washing and draining the rice a couple of times, add it to the pot, along with salt to taste and enough water to cover the rice to the level recommended for white rice. Take note that American rice cookers should feature measuring markings in the pot’s interior. If you do not have markings inside the pot or a rice cooker cup, use a one rice cup to 1 1/4 water cup ratio.
4. Set the white rice mode for cooking.
5. Allow 10 to 30 minutes for the rice to cool in the closed cooker after being cooked.
6. It is best to fluff the rice with a fork before serving it.
You can also opt to cook Calrose rice on a stovetop by putting one cup of Calrose rice, filtered through a fine-mesh strainer under cool running tap water until clear. Bring the rinsed rice, 1 1/3 cups of water, and salt to taste to a boil in a small saucepan. Use a lid to cover the pot. Turn the heat down to low, and cook for about 20 minutes or until the water is fully absorbed. Take the pan from the stove and set it aside for ten minutes while covered. Before serving, use a fork to fluff.
When using an Instant Pot, pour one cup of Calrose rice into a fine-mesh sieve and rinse it under cold running tap water until the water is clear. In the pot, mix the rinsed rice, one cup plus a tablespoon of water, and enough salt to flavor the rice. Place the lid over the pot and set the timer for six minutes under a high-pressure setting. Let the pressure naturally dissipate for approximately ten minutes. Use a fork to fluff the rice before serving it.
How to tell when your sushi rice is well cooked?
The cooked sushi rice should be sticky but firm enough to hold its shape. If the rice has become mushy, it was steamed with too much water. If the rice is crunchy, add extra water and simmer for a longer time. (Note: if you use an InstantPot or sushi rice cooker, undercooked rice is a distant memory!) Sushi rice should be consumed in three days and kept in a refrigerator in an air-tight container.
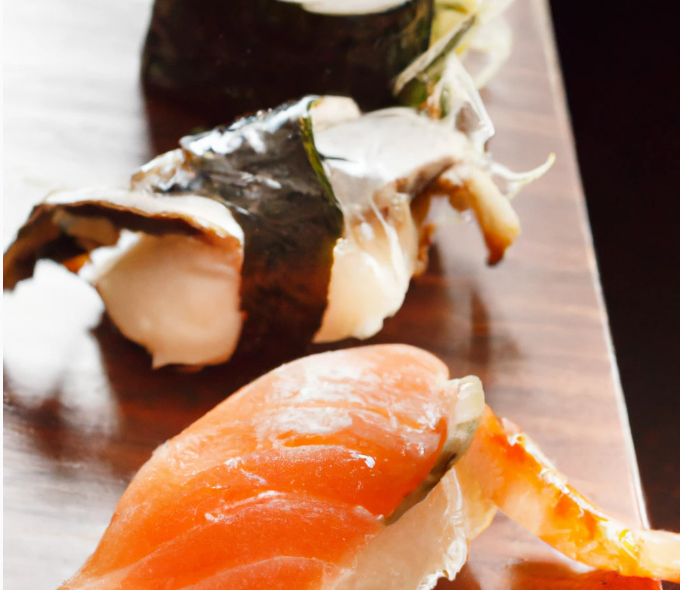
You can use perfectly cooked sushi rice to prepare different sushi recipes. From California rolls to temaki sushi (hand roll) to spicy tuna rolls to chirashi sushi to Temari sushi, and many more, it is possible to make this simple sushi rice recipe.
How to properly store sushi rice?
If you want to store your sushi rice for more than three days, we recommend putting it in the fridge. Do not let it dry and harden in the refrigerator, but instead store it in an air-tight container and place it in the freezer for a maximum of four weeks. You may opt to defrost it overnight and then microwave it to reach room temperature when you want to use it. Cover it with a thick towel before placing it in the fridge if you’re going to prolong its lifespan. In turn, this will ascertain that the sushi rice, also known as Calrose rice, does not become cold and maintains cool and safe temperatures.
Nutritional Facts of Sushi Rice
Check out the page we have dedicated to this
Carbohydrates: 170.31g
Calories: 765.32kcal
Fat: 1.04g
Protein: 13g
Polyunsaturated Fat: 0.28g
Saturated Fat: 0.28g
Monosaturated fat: 0.32g
Potassium: 152.8mg
Sodium: 1177.01mg
Calcium: 14.9mg
Fiber: 5.6g
Sugar: 11.98g
Iron: 8.48mg
Cuisine: Japanese
Summary
Now that you know how to cook sushi rice, you can make homemade sushi and various other sushi rice recipes. Be sure to share a pic of your sushi rice meal on Instagram with your friends and family or discover more unique recipes on Youtube.